Welcome to The Pauley Principle!

The Pauli Principle, named for Wolfgang Pauli, deals with atoms and electron-sharing that results in new, stronger bonds. Think 2 parts hydrogen and 1 part oxygen, a shared delectable (!) electron and VOILA! Water!

Similarly, when you prepare whole food to share with family and friends, especially foods you've grown, something amazing happens. Meals become tastier and healthier. Your soul, not just your stomach, becomes fulfilled. You live life more abundantly as a result. During a shared meal, the bonds that people create grow stronger and become something new: GREATER than the sum of the parts! I give you The Pauley Principle.

Friday, December 30, 2011

Food Fest--New Year's Friendly Family Competition

Each pizza creation gave a unique but scrumptious food experience.
Last year was the beginning of a new tradition in our family with a food challenge to ring in the 2011 New Year. Our Pizza Bake-Off, available in an archived post, was such a hit with the grandchildren, our judges (they're SO easy to bribe!!!), that we all decided on another food competition to bring in 2012. 

After several discussions, we settled on a RibFest this year. The adults are all dreaming up the various ingredients and cooking methods, made even more challenging by some food allergies to work around, but it's sure to be another event that offers great fun and food for all. I'm making my two ranges and the outside grill/smoker all available for the cooks. 


I've taken special requests on side dishes that include Napa cole slaw, baked beans, and corn casserole.

Note:  Any attempts at weight control/loss will be put on the back burner until this food challenge is over!

Question: What are your New Year's Traditions?

Thursday, December 29, 2011

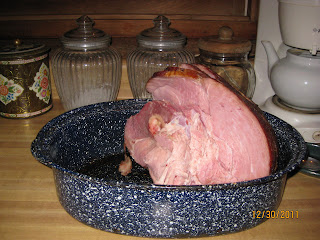
Solutions for Left-over Ham! Two REALLY Easy, REALLY Delicious Recipes!

One more meal of sliced ham but then what?

Here are three things to help you stretch the ham dollar and give you more tasty meals:
1. First, freeze the large slices in usable portion size. 
2. Chunk up the rest for yummy ham salad. (Recipe follows.) Leave some meat on the bone.
3. Make a delicious and nutritious bean soup with the ham bone and those luscious pieces of ham that cling to it. (Recipe follows.)

These recipes are incredibly easy and delicious!


HAM SALAD

Start with a ham that is tasty and not dried out. A little ham fat adds flavor, but be skimpy with it. Trim carefully so as not to get gristle or chunks of fat.
I prefer to use an inexpensive grinder but I've had ham salad that is minced or chopped and it's just fine. A food processor would also give a great result. The important thing is that you use real ham, real eggs, a good quality of mayonnaise, and some pickle relish. That's it! This is SO EASY!!!

1 1/2 to 2 cups of ham, chopped fine or ground
3 to 4 eggs, boiled, shelled, chopped fine or ground
2 heaping tablespoons of mayonnaise (Hellman's is so good for this!)
1 heaping tablespoon of sweet pickle relish


Really, that's it! Just process the meat and eggs to the consistency you like. Add the mayonnaise and the sweet pickle relish. Stir it up, adding more mayonnaise or pickle relish to taste,  incorporating the flavors throughout and WOW!!! 100% Pure YUM and I guarantee you can't buy a ham salad that tastes that good and fresh! Makes a great sandwich with potato soup. Oh, yeah! Or serve with crackers.
Feel free to add onions, but your ham salad won't stay fresh-tasting as long.


BEAN SOUP

1 ham bone
1 pound of navy beans
2 sticks of celery, chopped
1/2 onion, diced
sweet pepper or hot pepper, diced, to taste
2 teaspoons salt
generous pinch of freshly ground pepper
2 quarts of water to start, or enough to cover the ham bone

You can parboil the beans ahead of time, if you like. I always rinse the beans and check for little rocks but it's really pretty rare to find one! Just an old-timey habit!

Simply place all ingredients into a stock pot. Place on high heat to bring to boil. Turn down the heat to simmer, cover, and simmer for 1 1/2 to 2 hours. Add water as needed. Check seasonings and adjust. 
Serve with cornbread. What a treat!!!

Question: What are some of your favorite ways to use your left-over ham or ham bone?


Chopping, Chopping Broccoli!

Remember Dana Carvey's Saturday Night Live Skit? I can't get it out of my head!

While Chris is out chopping firewood, I find myself chopping veggies and thinking about how he always says I'm using the wrong tool when I chop vegetables. (I tend to reach for the carving knife.) When I watch cooking shows on TV, he points out the knives the cooks are using. He should know. He's all about his tools. That's why he made the nutcracker for me!

A few years ago, Chris bought himself a Wusthof knife for hunting. He made the mistake of bringing it into the kitchen and I just love it, so when I saw this special Wusthof knife that Chef's Catalog is offering, I knew I had to tell you about it. This offer is a real deal at 64% off for a Wusthof Silverpoint II Nakiri 7-inch knife. Check out its design. The special price is just until January 3, so hop on it if you need one! Chris says, "Always use the right tool for the job." I say, "Buy once, but buy a good one!"

<a href="http://gan.doubleclick.net/gan_click?lid=41000613802179547&pubid=21000000000514512">Wusthof Silverpoint II Nakiri, 7-inch</a>
"http://gan.doubleclick.net/gan_click?lid=41000613802179547&pubid=21000000000514512"

I hope this link works for you but if this doesn't show the photo, try the link on the sidebar. I'm hoping you'll try it. If you do, Chef's Catalog will thank me, and I'll thank you! Remember, time is running out!

Tuesday, December 27, 2011

Amazing Grace! Christmas at Our House


One of our granddaughters with Patience and Josh, all looking much too subdued for a Christmas party!
  Ooh, making punch with the grandchildren! (We'll get this party started!)
Everyone gets into the last minute food prep. It looks like Chris is the Master Chef giving instructions.
Of course, I wanted Gordon Ramsay, but I guess he was booked!
Jessi, aka Gluten Free Girl, shares a hug with her niece.

The grandchildren open their group gift from Jessi while she snaps their picture in the background. Get ready.  GET SET!  GO!


Let the mad ruckus begin!


I could not contain my excitement!!! This is a can of grape pulp. We had a poor year for grapes and this is my consolation. YES!!! I can still make wine! Thank you, Chris!
Here's Chris asking, "Is this for real? Really, is this real or just some random box?" By the way, the bearskin rug he's sitting on is NOT real.
Things I didn't show: a shy guest, the group prayer led by the children, the bottomless punch bowl, the food, the eating, the children singing Christmas carols as they tried politely to lure the adults upstairs to where the tree and presents were waiting, the unveiling of the other gifts, the joy of just being with each other. 
Having a family you love deeply and being able to be together is the best gift God could provide on this day that so richly honors His Son, 
the reason for the season.

Wishing all of you the joy of love throughout the New Year and Always! 
If you don't feel it yet, don't give up. Don't ever give up. Everyone in my family has gone through dark, dreary days when each person wondered if the light really shined, not being able to see through the darkness
to the end of the tunnel.
Work hard to create the love. 
Let your light shine! You will be blessed.

Monday, December 26, 2011

NOW THAT'S A NUTCRACKER!!!

AN UNHAPPY ONLOOKER

We have a new nutcracker at our house, and it's creating 
quite a stir! 

Chris designed it, built it, engraved it, and surprised me with it at Christmas.
Chris is demonstrating the various positionings of the nut.


This tool is a thing of wonder, and it works just the way Chris planned. With a little pressure on the handle and a well-placed nut, VOILA! The nut is cracked! Not shattered and flying all around, and not smashed so that you end up with ground nut meats,  but cracked so that you can actually pick out the nut! 

Of all the nuts, black walnuts are the worst nuts to crack. To make black walnut fudge, I used to get a hammer and crack the nuts from our walnut trees on a big rock out in the yard. Then, I'd crawl around looking for little nut pieces. Actually, the nuts ended up more smashed than cracked and the pieces would be so small that, when I tried making fudge, you wouldn't detect any hint of black walnut flavoring or pieces of walnut. 

I've already tried the new nutcracker. Fun, fun, fun! I am so ready to make some yummy black walnut fudge. And Chris already has a buyer for his next nutcracker!
 (Bye bye, little nutcracker-in-name-only! I've got a brand spankin' new nutcracker and you're being replaced. Admittedly, this one isn't pretty like you, but you couldn't live up to your name. Now it's the end of your game.)  


Tuesday, December 20, 2011

Janice Poachman's Christmas Sandwich Cremes

My husband and I, married 29 years and counting, still learn about each other. There's still that sense of awe and mystery sometimes. Our recent revelation was about favorite cookies. Little did we know, we had the same favorite! All we could do was describe it, not knowing its name.

My husband thought this would be perfect for Santa.

I slapped the filling on pretty fast. Maybe I'll pipe it on next time for a prettier finish.
I had never before tried to make them. In fact, I couldn't find a recipe since I didn't know what they were called. That's one reason I love search engines! So, here's a recipe out of Ontario, Canada. Janice Poachman was kind enough to send her recipe into Taste of Home. I tried it, and I like it! This will become part of our tradition. But, putting a full plate of them under the Christmas tree? Roll over and go back to sleep, Santa!
Go to this link for her recipe and a mouth-watering photo:
http://www.tasteofhome.com/Recipes/Christmas-Sandwich-Cremes/Print

Thursday, December 15, 2011

ODE TO THE INCREDIBLE EGG AND THE HENS WHO LAY THEM


Every morning lately, I've eaten one of our little pullet eggs.


Every morning lately, my husband has eaten one of the very large duck eggs.


The flavor of the eggs amazes me! They're delicious! The organic eggs I've bought have been similar in look but not so much in flavor. Maybe it's because I have a friendly relationship to the hens, but I'm more delighted with both the flavor and the quality of these eggs. Some of you have chickens. Don't you just love it?! It's so handy that we're getting eggs now. I didn't expect it to be so soon! And the taste!!! Have you tried duck eggs?  I'm just as pleased with the flavor and quality of the duck eggs, and the loft they give to baked goods is impressive! Well, I could go on and on.

In homage to the egg, I have to say it exemplifies the Pauli Exclusion Principle. Each is unique but, in combination with other ingredients, the egg shares its qualities to make truly remarkable chemical reactions in the kitchen!!! I've been up to my elbows lately in eggs, sugar, butter and flour lately and loving the results!

Of course, the egg would not be possible without the hen who lays it. Yes, the hen comes first! Chris takes really good care of the feeding and housing of our chickens and ducks. Our 48  pullet hens, the little Speckled Sussex, are giving us 2-3 eggs a day, with nary a laying nest!  Our 4 ducks are laying 3 eggs a day on average in a shared laying box, although one insists on dropping hers in the pool. What's up with that?!

The chicken condo at an earlier stage of development.
In homage to the chicken, my husband has been working evenings trying to complete the chicken condo that had, up until now, just been a shell with a brooder in one corner. NOW, he has installed two large picture windows in the south end (at the unseen left wall in the photo) with a trap door and ramp underneath that will lead to the outdoors for free ranging. He has walled up the room for the Speckled Sussex, a new and larger area that will soon be equipped with a roost and real nesting boxes!  They'll no longer have to fluff up the bedding in a corner of the brooder!

Question: Why do our hens roost backwards? 

Second question: When spring comes, and these hens really start laying, 
what am I going to do 
with all those eggs???

(I'm giving more and more thought to the local Farmer's Market on Saturday mornings, but if all I have to offer is eggs, is it worth the set-up? On the other hand, what other things might I offer? I DO like baking, but it seems so many people are offering baked goods. Our local market is saturated. Maybe something different...)
Chris is measuring for laying boxes. Notice the camouflage wall? It happened to be the best buy that day.
Here I am with the Speckled Sussex. They're so cute and friendly. The hens will be happy to have laying boxes and a larger roost. They're still using the brooder and making nests in the bedding for their 2 to 3 eggs a day.

And here's Roosti-Roo, a very proud fella!


Wednesday, December 14, 2011

Chocolate Fruit and Nut Cups

These chocolates are the best yet, according to my husband. He's says they're better than Chunky and he really, really likes Chunky!

The ingredients are few and gluten free, if you're careful about what you use. The secret is in using the best ingredients you can find.
The steps are so easy you won't even believe!

16 oz. Ghirardelli double chocolate
1 cup of mixed dried fruits (I use cranberries, currants, and cherries.)
1 cup of very fresh assorted salted and roasted nuts

Chunk up the chocolate and place into a bowl that you can put over a pan that is half-filled with water. Be very careful not to get water or any other liquid into the chocolate. 

Heat at medium low and stir chocolate until smooth. 

Mix fruits and nuts together until well blended and then stir into the chocolate. Remove from heat. 

Drop by tablespoon into an ungreased mini muffin pan. Refrigerate for at least 2 hours. When cool, the chocolate should release easily by inverting the pan and doing a gentle twist. 
The finished chocolates have a beautiful gloss and smooth, rich texture. To complete the look for serving or to package as a gift, drop each fruit and nut cup into little cupcake liners and place in airtight tins or decorative plastic containers. 

Top to bottom: two containers of chocolate fruit and nut cups, chocolate chip cookies, meringue-covered bar cookies, ready to serve for a Christmas Tea!


Monday, December 12, 2011

Make Your Own Summer Sausage!

I've made summer sausage many times, but this time turned out to be the very best summer sausage I've eaten! I made adjustments to both the recipe and the process. I hope you'll try my recipe, make adjustments to suit your own tastes, and get into the habit of making your own meat treats! This is another delicious gift that is always appreciated. Package it up with crackers and cheese, and mmm-MMM! A purely delightful snack to give or receive!

I started out with 4 lbs. of ground venison mixed with 1 lb. of ground beef suet. This was a fine grind. You can substitute ground beef or do a mix of venison and beef, ground together.
Gather your seasonings: onion powder, garlic powder, cracked black pepper, mustard seeds, dried mustard, liquid smoke, Morton Tender Quick and water. You'll also need a fibrous sausage wrap for best results.

INGREDIENTS:
 4 lb. ground venison
1 lb. ground beef suet
1/2 tsp. onion powder
1 tsp. garlic powder
5 tsp. cracked black pepper
2 tsp. whole mustard seed
1 tsp. dried ground mustard
4 tsp. liquid smoke
5 T. Morton Tender Quick
3 cups water

First, make a slurry of all the seasonings mixed into the water. Then pour it into the meat.


Using a wooden spoon, mix it well so that the seasonings are well incorporated into the ground meat. 


Chris used 1 lb. capacity fibrous casings with his grinder/sausage stuffer, packed the casings tight with the sausage mixture and then secured the packages with hog rings.


Be especially careful to pack the meat in tight. Use a pin to release any air pockets. Then allow the sausage rolls to cure overnight in the refrigerator.           


The next day, position the sausage so that the rolls are not touching each other on an oven rack over a pan or in roasting pan with a rack so that you catch the drippings. Or, lay down a sheet of foil to avoid a mess in your oven.

Set the oven temperature to 170 degrees F and just leave the door open as you gently bring the sausages up to heat. Then, after an hour, close the oven door. Maintain this temperature for about 5 hours. Check the internal temperature of a roll of sausage. You want it to reach 152 degrees. At this point, not quite there, I boosted the oven to 200 degrees for two more hours. When you get the 152 degree reading, remove the sausage rolls from the oven and spray with cold water. Bring the internal temperature of the sausage down to 120 degrees. Refrigerate or package for freezing. The summer sausage, when cooled, will be ready to eat.

Wednesday, December 7, 2011

The Name of this Blog and How It Came to BE

WORLD BOOK illustration by Leonard E. Morgan
The Pauli Exclusion Principle is a physics term that means no two electrons in an atom can occupy the exactly the same position. 


 I simply apply that to people. We are each unique, with our own space. That term also has to do with the interconnectedness of atoms, particularly the sharing of electrons to make bonds, creating something greater than the sum of the parts. For example, take a couple of  hydrogen atoms, then add an oxygen atom and VOILA! WATER!!! Again, I apply that to people. By sharing with others, the energy we create becomes so much better than the sum of adding up people, each person in isolation. 

Why do we care? When you look at the tiniest forms of existence and start to understand them, their uniqueness, their importance, their potential for interconnectedness, then you begin to realize how very great the human experiment really is!

Wolfgang Pauli, an Austrian physicist, contributed largely to the production of the Periodic Table that so many of you remember from chemistry classes. No relative of mine, I'm just lucky to have married into the family of Pauleys, so that I can apply this theory of physics to human endeavor! I bring you The Pauley Principle.

Monday, December 5, 2011

Christmas Cookies and Holiday Baking--Finding Recipes Fast!

I love looking at the pics of Christmas cookies, but some can be so time-consuming! Just saying...

For personal, palatable satisfaction, it's really hard to beat cinnamon rolls. 

 Sure, you can fancy them up with sugar frosting but any way you go about it, they are just PURE YUM! I include recipes in my January 2011 posts on this blog.

As for cookies, I have not yet begun my cookie-baking frenzy. I'm wanting some new ideas, or maybe twists on old favorites but, especially, I'm on the look-out for cookies with real eye appeal, especially with the pressure of cookie exchanges that can be so competitive! Some sites I recommend for cookies and holiday baked goods:

www.pillsbury.com/Christmascookies
www.foodnetwork.com
www.Christmas-cookies.com
www.marthastewart.com

You'll find photos and recipes for a range of difficulty levels. Happy baking! Send your holiday baking thoughts, experiences and photos to share with others if you like. I enjoy the feel of making cookies. Then, while they're baking, you begin feeding the other senses with the wonderful smells and the artistry of the visual display. Oh, yeah...it's almost time to start!

What is your favorite holiday cookie? 

Saturday, December 3, 2011

Making Venison Jerky


A friend of ours, Shaun, sent some beautiful venison steaks to me with the message:
Do something with it! 

I guess he didn't have time. For us, it was too much for one meal and late at night. The beautiful pieces of meat, about 1/4" thick, had been frozen but were thawed when he sent it. I decided to turn it into jerky. First I needed to gather supplies. Then I needed a seasoning blend.

Supplies: a baking pan, a cookie rack or some other suitable drying rack, a meat tenderizer, a wooden board. Now, when I say meat tenderizer, I mean a tool that looks like a hammer that has a rough face, not a blend of chemicals.

Seasonings that I've made in the past were teriyaki, garlic, and hot and spicy. I make my own blend with a Krups spice grinder, but there are perfectly good blends on the market. For this jerky, I made it mildly spicy, although just being near the blend while I was grinding it could take your breath away. I started coughing! The seasonings I chose were: red pepper flakes, paprika (for another layer of depth and smokiness), salt, and black pepper. Experiment with amounts to suit your taste. Very simple.  (None of those other terms you'll see on Uncle Buck's such as hydrolized soy protein, dextrose, caramel color, potassium sorbate, sodium erthorbate, or sodium nitrate.) I want a product that's good for you, not one that will last my lifetime!
This tenderizer makes seasoning and pounding easy.

Lay the seasoned, pounded pieces on the rack.


Begin by laying out your meat on the cutting board and sprinkling each piece liberally with your seasoning blend. Use the tenderizer to pound the pieces to almost half the thickness. Turn the pieces over, sprinkle with seasoning, and pound. When you're finished, your pieces should be about 1/8" thick or so.

Place on an oven-proof rack on a baking sheet. Put into a 170 to 200 degree F oven for about 4 hours. Turn. Watch them in about an hour and check for dryness. The pieces, still warm, should have a little flex to them. They don't need to be perfectly brittle. As they cool, they'll lose more moisture. Cool completely before wrapping for storage.

The rack allows plenty of air movement so that the jerky won't stew in its broth.
Shelf life depends on the amount of salt you use. Jerky doesn't last long at our house. I put some on the table and then, WHOOSH! It's gone! There are other modern ways to make jerky: You can soak the pieces in a brine. You can use a food dehydrator. I've done those and those methods work fine. The method I've described is easy to do and the result is just as delicious!


Friday, December 2, 2011

The Best Things in Life Are...Just Plain Messy!

Perhaps I realized on the day I was born, in a great big two-poster bed that had been specially made for my great grandfather in Washington C.H., Ohio, by a carpenter named Burnette, the first piece of furniture my great grandfather commissioned when he returned home from the Civil War and awaited his upcoming marriage to his fiance. I now have that bed, my birthplace. Anyway, I believe whatever thing of value that we make in life is messy at some time during the process, and that's where the fun is, at least partly.

That's why I love cooking! The feel of getting your hands into it, like noodles, just getting all messy and gooey, becoming part of it! Then the wonderful smells, sometimes the sound, the sight of food when it comes together, and then of course the final reward~the taste! There is so much personal satisfaction in that!

Sharing the fun with friends or family suddenly bumps it up to the next level.

FOOD RULES, A MUST-READ

I really enjoyed this book! Easy and fast to read, the book is written tongue-in-cheek by Michael Pollan. It's one that a family could pass around and everyone could read in a day. More white space than print, but don't be fooled:
       The print is powerful! 

You can find used copies on Ebay for less than $10, total. Newer versions have delightful artwork. Once you read it, the book becomes part of you, so you can pass it on. You won't forget what you read. Follow what it says, and you'll eat better and feel better for it.


Thursday, December 1, 2011

FUNTHINGS TODO! Ideas for Gathering Friends and Family for the Holidays


It's a Christmas Cookie Exchange that a friend of mine is hosting and I'm so excited!
BTW, that's a wonderful way to get family and friends together for the holidays. Then, everyone walks away with a great assortment of cookies, ready for parties or gift-giving!

For this particular party, besides sharing cookies, the guests will also be sharing their recipes. Now, what to bake? What to bake? Hmmm...maybe NO-BAKE. Any ideas? I want a cookie that will be as much a delight to the eyes as it is to the tongue but not too time-consuming or complicated! Of course, I'll want to post the end result and maybe the recipe.

Also consider another FUN, FUN, FUN (!!!) Christmas tradition of mine~the TAFFY PULL! If you've never done it, you might want to consider making it your own family funthing for the holidays or anytime. It requires more than one person, so plan a time when you can do it. My mother's recipe (God Bless) is posted. I miss my mother every day, but using her favorite traditional recipes brings a warm feeling, almost like having her there. She wouldn't mind my passing them on but, I'll warn you, she always left something out! Her little way of keeping her secrets to herself! It was always up to me to figure out what was missing. (She's still doing it. The missing ingredient is MOM. What a sense of humor!)

I challenge you to either start a new and fun family/friend tradition or do what another friend of mine is doing this Christmas~she's doing random acts of kindness all month long. She's already a kind person, just kicking it up to the next level!

Margie's Salt Water Taffy

MARGIE'S SALT WATER TAFFY

1 cup sugar
2 T cornstarch
3/4 cup light corn syrup
1/2 cup water
2 T margarine [or butter]
1/2 tsp salt
1 tsp flavoring (Think oils, not extracts.)
food coloring

Before you begin:
1. Plan your flavor and corresponding color before you begin. 
2. Prepare several 3" squares of waxed paper, probably 50 or 60. 
3. Butter a cookie sheet.

Then, let the fun begin!

Mix sugar and cornstarch in a 1 1/2 quart or 2 quart saucepan. Stir in corn syrup, water, margarine [butter, it's just better for you] and salt. Cook over medium heat, stirring constantly, until mixture boils and sugar is completely dissolved.

Continue cooking without stirring until 260 degrees F is reached and a hard, but plastic, ball is formed when a bit is dropped into cold water. Remove from heat and wait until the boiling stops. Then stir in your choices of flavor and color. 

Pour onto a buttered cookie sheet. Let stand until cool enough to handle. Butter hands and pick up a third to half of the taffy. Pull between you hands until the taffy has a satiny finish and light color. Pull into a 1" rope. Cut rope into1" pieces and wrap tightly in little squares of waxed paper.

Put the wrapped taffy into a pretty container. These make a delightful, and relatively cheap, gift!