Welcome to The Pauley Principle!

The Pauli Principle, named for Wolfgang Pauli, deals with atoms and electron-sharing that results in new, stronger bonds. Think 2 parts hydrogen and 1 part oxygen, a shared delectable (!) electron and VOILA! Water!

Similarly, when you prepare whole food to share with family and friends, especially foods you've grown, something amazing happens. Meals become tastier and healthier. Your soul, not just your stomach, becomes fulfilled. You live life more abundantly as a result. During a shared meal, the bonds that people create grow stronger and become something new: GREATER than the sum of the parts! I give you The Pauley Principle.

Friday, January 27, 2012

To Market, To Market...Which Way Do We Go?

With our gardening, chickens, and Christmas trees, Chris and I are approaching the crossroads. Flip a penny, turn left! Flip a penny, turn right! I think I'm going to the nearest class that is presented by a more knowledgeable OTHER.

The Ohio Department of Agriculture and the OSU Extension Offices both offer classes on growing and marketing farm produce. I've signed up for a couple of sessions this spring. One I'm excited about is at a winery where I'll be attending Fruit and Vegetable School. Last year we found out grapes and berries come with their own unique pests and fungi. Cringe!  

So far, we've only grown our fruits and veggies to consume at home and share with friends and family but *sometimes* the yield exceeds all expectations, like with our pumpkins, butternut squash and zucchini!  Too many for us to eat, can, freeze or even find people to hand them to. Luckily, I've learned to appreciate the many ways to prepare butternut squash, a leader in supplying nutrients! YAY!!!


I eat so many squash and pumpkin blossoms, that I didn't expect to have a large harvest. Here, I was preparing to stuff pumpkin blossoms with cheese. Mozzarella is nice, but hot pepper cheese is even better!

Fried with an egg/cornmeal batter--YUM!!!
There are several different ways to direct market your own farm produce here in Ohio:

  1. a Farmers' Market
  2.  a Farm Market
  3. a Pick-Your-Own farm
  4. a Roadside Market 
  5. a Christmas Tree Farm.


Chris and I had attended Christmas Tree College last year. That was fun! There are little white spider mites that like to invade pine trees. We actually had an attack of them! Luckily, I think all but one infected tree survived. It's worth the time and money when you learn what to watch out for and then how to deal with it. Our trees are still very young and not yet ready to leave the farm.

Supplementing your groceries with farm fresh veggies is not only a delicious choice but so, SO, frugal and nutritious!
Recently, I called the Ohio Department of Agriculture. We're weighing the benefits of  becoming a member farm with the local Farmers' Market or setting up our own Farm Market. Which way do we go? A Farmers' Market is a congregation of producers that set up in a convenient place for consumers. A Farm Market is usually set up at the farm location with just the one farm producer. We're almost there at the crossroads with our fruits, veggies, eggs and eventual trees, and I'm about to turn on the turn signal.

Which way to turn???

Tuesday, January 24, 2012

Build your Own Egg Washer--The Egg Jacuzzi!

Egg Jacuzzi
Yes, it's an Egg Jacuzzi, and it gets our eggs sparkling clean! 

Chris built his Egg Jacuzzi along the basic design of the Incredible Eggwasher that sells  for about $116. The Egg Jacuzzi is incredibly simple and inexpensive to make, and you can save a bundle by building one yourself. 


Step by step instructions follow along with a brief video.

The end result is sparkling clean, sanitized eggs.


You need a five-gallon food safe bucket.
 

1. Start with a food safe plastic 5-gallon bucket.  2. Measure the bottom. 3. Using PVC plumbing, form a square  with a bar across the middle that will fit in the bottom of the bucket.  4. Drill holes in the pipe, angling the holes toward center.  5. Make an upright piece the height of the bucket, add an elbow, and attach a ball valve.  6.  An electric 2.1 cu. ft. psi air compressor works well. The chuck on the end of the hose needs to attach to a quick connect on the PVC pipe.  

If you're cleaning two dozen eggs, two gallons of water with egg wash works fine. The weight disc on top of the eggs keeps them in place. Gently put the egg basket into the Egg Jacuzzi and turn on the air compressor. The ball valve can adjust the air flow to the eggs. The eggs need 15 minutes in the Egg Jacuzzi and then a clean water Jacuzzi rinse. 
Chris says, "It's important to regulate the airflow so the eggs get uniform bubble action. That gets them evenly washed and sanitized. I don't like the idea of using chlorine but I like the idea of an unsanitized egg even less."


Sunday, January 22, 2012

An Icy Retreat


the patio furniture and steps, decked out with glistening icicles
Winter weather advisories for the area convinced Chris and me that I should leave the night before a workshop in order not to be stuck at home and miss it. How wise!


While I was gone, the driveway became a skating rink ready for action, and the bushes! They had a heavy coat of ice with icicles dangling everywhere, and not always straight down. Obviously, there had been wind as well as freezing temperatures and drizzle. These scenes greeted me when I returned home.


frozen coriopsis


icicle limbs of the buckeye tree with the frozen woods beyond


 ice-encased bridal veil spirea
If I hadn't driven to the hotel the night before, I would have stayed home since roads were ice-covered as well. SO glad I went! I gained some knowledge and skills, made some new friends, and have all sorts of ideas for work! 


an icy retreat

Today's forecast: freezing drizzle. I put cleats on to take care of our animals because it was too icy to walk in my boots! The pantry may not be well-stocked, and I have no gas for the fireplace, but somehow I think I'll be just fine even if the power goes out.

Saturday, January 21, 2012

Poll Results: 10 Essential Emergency Food Items

Imagine you're stranded at home because of the weather. You may be there for days. You go to your pantry, whatever it is, whether it's one shelf above the sink or a walk-in storage warehouse. What 10 foods would do you the most good?

Imagine ice, below zero, and the wind is ferocious!
I've sought the advice of several friends and searched the Internet trying to find out what people think are the essentials. It turns out all these people turn consistently to comfort foods such as soup (mostly chili), chocolate (either candy or hot chocolate), and popcorn. So, here is my list of the 10 emergency food items to stock up with for those wintry occasions:
  1.      broth 
  2.      potatoes
  3.      canned or dry beans
  4.      tomato sauce and/or canned tomatoes
  5.      chicken, beef or venison
  6.      spices
  7.      cooking oil
  8.      something chocolate
  9.      popcorn
  10.      bread, crackers or tortillas
     

Thanks to everybody who participated! The list goes on and on but especially a big thank you to Althea, Cherie, Danita, Desiree, Jessi, Josh, Logan, Pat (who actually was somewhat stranded in Washington state and inspired my question-BIG THANKS! I hope you're still cozy!), Patience, and Patsy.

Several things should be on the list if we could add more.
Question: 
If you could increase that list to twelve, what 2 items would you add?
Please answer and then go stock up ASAP!!! This weather can change in the blink of an eye!

Wednesday, January 18, 2012

There Must Be 15 Ways to Stretch a Chicken

When I was growing up, I didn't realize my parents were part of the homesteading movement. Yes, even then.

We had chickens. We had a pig. We even had goats since my dad loved fudge and goats' milk had been recommended by my dad's doctor for his digestive system. The list of homesteading feats goes on and on: the garden, the fruit trees, the canning and freezing. And it seems that nothing went to waste. Not even the feet.

When you grow up that way, you sometimes believe that everyone has had the same experiences as a child. I'll never forget sitting around a dinner table in my own home, in the presence of adult guests, and asking, 


       "Really, who here has not eaten chicken feet?!"

A moment of silence followed. Eyes from all around the table were turned on me. Mouths open, with no words, some in the midst of chewing. What I had said seemed natural enough to me. That's the way it was. When it was time to put chickens in the freezer, my mother would collect, clean, and skin the chicken feet and then deep fry them to a crispy delicacy. I thought, of course, everyone did that! In some regions of China, it's still considered a delicacy.

So, in this blog, I enjoy passing on the practical, as well as the impractical, ways that I've learned to save a dollar or two. No, I've never actually served chicken feet. A number of other delicacies from my childhood will also never be served at my table, but may be served up as food for thought in later posts!

The point is, we can get a lot out of one chicken. Consider stretching one large roasted chicken into three,  3, meals for a 4-person family. First, begin with a very large chicken to roast, over 4 pounds. Roast according to your taste. I like to roast mine, stuffed with celery, apples, and seasonings that include sage, rosemary, thyme, salt and butter. No bread stuffing in my chicken though. The outside of the chicken I butter liberally and then sprinkle with the same seasonings. I then roast at 325 degrees F until the internal temperature reaches 180 degrees F. I'd rather overcook than undercook a chicken. Test a leg joint. It should flex easily and reveal the meat without running pink juice.


one roast chicken
Then, for the first meal, simply serve roast chicken with all the trimmings (mashed potatoes or dressing, gravy, veggies). That may leave you with a considerable amount of chicken left over, and you can plan to do any number of things with it.

For broth, start by taking all the meat off the bones. Reserving the meat. We'll come back to that. Place the bones and any pieces that you wouldn't want to chew on in a Dutch oven or stock pot. Cover with water. Add 1 cup chopped carrots, 1 cup chopped celery, 2 T onion and a tsp of salt. Bring to a boil. Cover and simmer for a full two hours. This will give you a basic chicken stock that you can use in other meals. Freeze it in ice cube trays and transfer to plastic bags or use within a week.

fresh veggies
Remember the importance of veggies in your diet because the only way to stretch a chicken into three healthy meals for a family is by sprinkling your plate with a liberal amount of colorful veggies, breads and pasta! 

Since variety is the spice of life, having roast chicken for three meals in the same week, although delicious, could become dull. If you don't freeze the chicken for later meals, plan to use it up within four days. 

Ways to use chicken, stretching your dollar, without using even one chicken foot:

Mexican enchiladas, fajitas, tacos, chicken casserole;  BBQ chicken sandwiches, Italian tetrazzini with linquini, Italian cacciatore with spaghetti; Asian chicken salad, chow mein, moo goo gai pan (chicken and mushrooms served with rice); chicken spinach salad, chicken and lettuce wraps (beansprouts, anyone?); Philly chicken subs, chicken pot pie, cheesy chicken and broccoli bake, creamed chicken and biscuits, chicken and dumplings. 

Gotta stop. My mouth is already watering and I have chicken in the fridge! Here's the key thing to remember: 
We don't need a meal of just meat. Mix it up for a light salad, an Oriental dish, or a rib-sticking delight. When you serve your meals, keep them colorful with the addition of fruits and veggies (providing vitamins, minerals, flavonoids, etc.) and your body will love you for it! This will stretch your chicken dollar.  


Question: If you start with a whole roasted or BBQ chicken, how would you serve up the left-overs? 


Friday, January 13, 2012

Feeding the Birds, Caring for People

We got our snow/ice mix, and the birds know it. Some have been huddled in our forsythia bush, twittering loudly and fluffing their feathers. So, it's about time I filled the birdfeeders!

I'm actually doing an experiment to see which birdseed the local winter songbirds prefer: our chicken starter feed (on the left in the photo) or commercial songbird seed.  I will collect the data and try to be unbiased in my research, knowing that in the past our wintering songbirds have preferred a mix that has sunflower seeds. 


Vicki Escarra, President and CEO of Feeding America, will be a participant in "Remaking America: From Poverty to Prosperity", a round table discussion hosted by Tavis Smiley of George Washington University. Other well-known participants will be seated at the round table as well. The discussion will be shown live on C-SPAN, and PBS will be airing the event on Tavis Smiley from January 16 to 18. In the words of Vicki Escarra:
"It is high time that we end the vitriolic debate that continues to spread across our country, dividing us on the most basic issues of human need. Everyone among us has an opportunity and a responsibility to contribute to a bright future for America and that means making sure that everyone has enough to eat. Our nation's prosperity depends on it." 


Click the link above for more info on feeding the hungry. Strive to be part of the solution.  Everyone can do something!  There are good organizations that raise money to stock the food banks.  Local organizations do food drives.  Other organizations provide clothing and shelter in times of need. All of these groups need volunteers at times, as well as money. Click below for some trustworthy, charitable organizations:
Remember:   While a person may strive to be self-reliant, there are times when a person's needs slip through the cracks. Each of us, in turn, needs to lend a hand when we can.
(Although I planned to count birds, it's so cold and windy out that they're not even trying to eat!  Methinks me time could be better spent by making plans to bump up donations and to volunteer in a local food drive.)
What groups do you think are most helpful, either from the receiving end or the giving end?  

Wednesday, January 11, 2012

Building a Small Farm Mixer for Poultry Feed Production


It's chicken feed!
There's a certain gift some people have in seeing a problem and then finding a viable solution.

Problem Number 1: High-quality chicken feed from local suppliers became inconsistent and sometimes downright unavailable. 

Chris says, "The stuff I'm seeing commercially, what people label as 'organic', is not what's best for chickens. I wanted feed with fish meal as one protein source, but fish meal is costly, not sustainable, and so a lot of feed producers aren't using it. Another protein source is corn. Because corn is now at or near $7/bushel, due to the idea that corn is fuel, inferior grains are being substituted for a protein source. Several years ago, manufacturers began using terms like 'commodity grains' in the industry and adding 'grain products' to their feed labels, while they began utilizing an inconsistent mix of grains. Also, to appease the organic market, soybeans came into use, not necessarily what's good for animals but it sounds good. For example, when feed producers began using soybeans in dog food, they had to add grease to the feed to help the dog have a shiny coat and look healthier, masking the fact that dogs don't utilize soy protein as well as meat protein." Similarly, he noticed that usable and consistent protein sources in chicken feed were getting hard to find. Using inconsistent supplies of grains for protein, well, "that's just silly when fish meal, ground up whole fish, is a better protein source for chickens," according to Chris, who studied agriculture and used to work in a Purina feed mill. "The argument may be that it's not sustainable and cost is also a factor but, if you plan to keep chickens for awhile, you have to feed them well." 

The solution: Mix your own.

Using the formula on the label of the Kalmbach supplement bag, which contains fish meal, and figuring the ratio for 100 pounds of feed, Chris decided to start mixing his own feed for laying hens. The savings is considerable! Instead of using Purina Organic Omega-3 at $40 a hundred weight, his cost per hundred weight will be $17.67. That's based on today's market and some clever trades he managed: gleaning (cleaning out after picking) a neighbor's field corn and bartering dressed chickens for grinding the corn. 

        For several years, this heirloom corn sheller adorned our front porch. Now Chris has put it back in service.            
He dug this antique hand sheller out of the barn to clean the last kernels of corn off the cob so that none would go to waste.
By using the correct ratio for laying hens, Chris would use the Kalmbach supplement, ground corn, and oyster shell for a feed that would be a nutritional and cost-saving alternative to the best feeds on the market. One hundred pounds would be a good quantity that would stay fresh for his small flock of chickens.

Problem Number 2: Trying to thoroughly mix a batch of a hundred pounds by hand.  Mixers he had found for sale were much too large and expensive for small production.

Solution:  Since freshness is a factor, Chris knew he had to build a mixer the right size to make a small quantity of feed.
He had access to a rough old treadmill that a renter had abandoned, left outside in the weather when the family moved out. Chris didn't want to bring the treadmill inside our home because of its rough tread condition. Curious, he tore it apart and saw that the inner workings were just what he needed. By shortening it, changing a few things, rearranging the wheels on it, and then adding a used 55-gallon drum, he now has a feed mixer! To top it off, it has a speed dial! The drum rolls at whatever speed you set it.


The mixer needs an interior wooden paddle and a cover for the electronics. Then it will be ready to use.


1 to 2 mph works really well!

Monday, January 9, 2012

A Canadian Winemaker and Her Lasting Impact


watermelon and pear wines in the secondary fermenters


Hello, Carboys!


poor photo re-take but that was me at 6
The summer I turned six, I was lucky to meet a woman who seemed ageless. Her name was Jerry, and she became a close friend to my mother. Every summer thereafter for many years, I would return with my family to the country store in Ontario that Jerry and her husband owned, where we would pick up supplies for our continuing homesteading adventure on Cloud Lake. And on every trip to the store, Jerry and Mom would catch up over a glass of wine.

On one return visit, I remarked that Jerry never seemed to age. She laughed and said, "Why, child, that's because I'm pickled, eh!" Then she turned to my mother and winked.

Mom explained to me later that Jerry not only made wine, she probably imbibed a little more than she should. Still, I was fascinated and the fascination lingered so that, for a few years now, I have tried making several varieties of wine myself.

Because of my fear of over-drinking, I carefully limit my wine consumption to no more than one glass a day. Similarly, I don't want to poison anybody so I proceed with caution, following only trusted recipes and using only the most highly-recommended utensils. Just lately, I've tried other fruits besides grapes, and to my surprise the experiment has proven awesome! Blackberry and plum have been especially delightful!

With a bumper crop of watermelons this past summer, Chris convinced me to try making use of this fruit in winemaking. Then he brought me a friend's pears! Where will this end? Although very grateful, I reminded him that I was really a fan of the grape wines because of their link to heart health and I planned to try canned grape pulp next since our grape crop had been so poor at the same time that the watermelons were thriving. Before I could muster up the courage to spend the money on it, Chris surprised me with grape pulp!
The grape pulp is next to a decoration a friend of mine made from a wine bottle we shared.
Winemaking is a slow process when you don't add chemicals that would speed it up. The old-fashioned method allows the flavors to fully develop while keeping the final product pure. I like that. When you control the ingredients, the end result is pure delight. The anticipation and delayed gratification you experience after the fruit juice spends almost a year in fermentation makes it a pleasingly complex hobby.


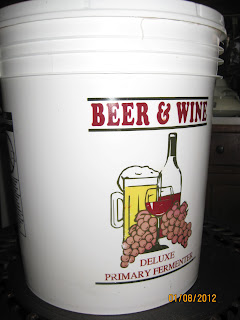
So now, Carboys, move on over and just wait your turn! It's time for my attention to turn to my Primary Fermenter again and my first love for winemaking! Bring on the grapes! 


Making the wine and sharing it with friends and family is "WOW!" for me. A perfect pleasure! I don't sell it, so if you want to enjoy a glass with me, we'll need to get together and do some catching up ourselves!


Friday, January 6, 2012

Unexpected Pleasures

German tea cup and saucer in the Orchard pattern, loose Earl Grey tea, and a tea towel!!!
Today I opened an unexpected package from Granny Sue, a writer and storyteller (see my blogroll). She must have been very happy with the maple syrup I sent her! The things that made this assortment especially well chosen are things Granny Sue could not have known about me: (1) I had just started a tea cup and saucer collection last summer so that I could do a vintage-style tea of mismatched cups with my granddaughters, (2) I try to always have Earl Grey on hand, and (3) I use at least two tea towels a day so I wash them almost daily!
Thank You, Susanna! I'm just blown away!

Making Nesting Boxes from Salvaged Materials


Salvaged materials had been collecting over the years in a stockpile on our small farm. Friends visiting the farm would look at the collection and ask, “What are you gonna do with that?” The answer had always been, “Build something, don’t know what yet.”

Last summer we bought some chicks and Chris started an on-going building project using the materials. What it turned out to be is what we laughingly call the Chicken Condo, a four-room dwelling, that will eventually be complete with kitchen for grinding and storing grain, two brooding rooms, and the coop with its nesting boxes and larger roost.
Chris is deciding his next step in the building process as he builds the Chicken Condo.
 The time has come to finish it, ready or not. We have 48 Speckled Sussex pullets and 4 young Pekin ducks who think it’s time to start laying eggs. Basically, they’re in puberty and can’t wait to get on with their lives! So, they’ve started showing us what they can do, and they’re very proud of themselves.


little brown pullet eggs and duck eggs


Our problem is that we hadn’t made the laying boxes, so Chris would play like it’s an Easter Egg Hunt every day. He’s currently finding about a dozen eggs a day, and he’s getting tired of the game. He wants his little hens to have what they need. They’re still sleeping in the brooder, so not what they need.

The local people know that Chris has always been, dare I say, frugal. Out of necessity he has become a resourceful fellow when it comes to building. He envisions what he wants, looks at what he has on hand, and then makes it happen. (The Chicken Condo actually looks like the beginning of a very modest home. People have stopped by the farm to ask about renting it.)

These nesting boxes are made from old culvert.

Buckets make a quick and easy nesting box. This photo shows the work in progress.
To finish out the coop, Chris was convinced that it wouldn’t take a lot of money. He again conceived a plan for salvaged materials, recycling what he had, or could easily barter for, to achieve what he needed. Form materials from pouring a bridge, a few used buckets, and some old culvert started to take shape in his mind. Here you see examples of two different styles that now adorn what appeared to be a boy’s bedroom just a few days earlier.


Look closely. You’ll see the camouflage paneling, one of the few things he bought new. Right after deer hunting season, it was the cheapest thing at the hardware store!
OOPS! The camouflage wall is deceptive, like a hen could roost there!


Wednesday, January 4, 2012

Country Fresh Bread-The Stuff of Which Romance is Made!

Cranberry bread, a bottle of good wine, and French bread. Near Heaven! Recipes follow.
I do believe, when someone comes in from the cold, there is nothing that warms the heart as much as the aroma of freshly baked bread. Then, add a glass of wine, and who can tell what may follow!

I offer ONE recipe that I follow precisely: a basic French bread from the Sedgewood Book of Baking, Sedgewood Press 1983. I can't get over how nicely it turned out, how deliciously nutty the flavor, and how amazing its texture! Honestly, I was blown away by it! I didn't expect such a pleasingly sensuous experience!

Plan several minutes of kneading time.

It is labor intensive, a great workout for upper body!

Divide the French dough into three sections and shape. This photo shows a work in progress. 

Voila! I can do it and so can you!!!


I think we get so used to tasteless, textureless breads that we forget how good food used to be! Let's bring it back!  Try these recipes. They're not hard to do, and you too will get delicious and nutritious results!

 Sedgewood's FRENCH BREAD

2 pkgs active dry yeast
2 tsp sugar
2 1/4 cups warm water  (105 to 115 degrees F)
6 1/2 to 7 cups all-purpose flour
1 T salt
cornmeal

1. Place yeast and sugar into large mixing bowl. Add warm water and stir until yeast and sugar are dissolved. Let stand 5 to 10 minutes or until foamy. [This is called "the bloom", and it's very important when using yeast to include this time for the yeast to go into action.]
2. Add 2 cups flour and the 1 T salt to bowl. Stir with wooden spoon until smooth. Stir in as much remaining flour as possible, 1 cup at a time, to make stiff dough.
3. Place dough on lightly floured surface and knead in as much flour as necessary to make fairly stiff dough. Continue kneading about 8 to 10 minutes or until dough is smooth and elastic. Place dough in greased bowl and turn to coat entire surface. Cover with clean towel and let rise in warm, draft-free place for about 1 to 1 1/2 hours or until doubled in bulk.
4. Grease a large cookie sheet and lightly sprinkle cookie sheet with cornmeal. Punch dough down and place on lightly floured surface. Knead dough 2 minutes. Cut dough into three equal-size pieces. Shape each piece into a roll, about 10 inches long, tapering ends of each roll. Pinch ends to seal. Place on prepared cookie sheet, spacing them about 3 inches apart. Lightly brush each loaf with cold water. Cover and let rise in warm, draft-free place about 1 hour or until loaves are doubled in bulk. 
5. Pre-heat oven to 425 degrees F. Uncover the loaves and cut 3 or 4 diagonal slashes across top of each loaf with a very sharp knife. Place large, shallow baking pan, half filled with water on bottom rack of oven. Bake loaves 35 to 40 minutes or until loaves are lightly browned and sound hollow when tapped on the bottom. Bursh or spray loaves with water every 10 minutes of baking to give bread a nice hard crust.
(The Sedgewood Book of Baking can be found used for a reasonable price from Alibris and Amazon. It has wonderful tips for the novice baker!)

My gluten-free cranberry bread is loosely based on a packaging recipe of Hodgson Mill's All Purpose Gluten Free Baking Flour but, for this bread, I used various ingredients and methods for a yummy and different result and, again, the flavor and texture were like magic!

 ZESTY CRANBERRY BREAD
(shown in top photo, on the left)
2 1/2 cups Hodgson Mill All Purpose Gluten Free Flour
3/4 cup granulated sugar
2 T Hodgson Mill Organic Milled Flax Seed 
1 T baking powder
1 1/2 tsp xanthum gum
1 cup sweetened dried cranberries
1/4 cup dried currants
2 large eggs, room temp
3/4 cup milk
2 T vegetable oil
2 T butter, melted
1 tsp vanilla
1 tsp salt

1. Blend dry ingredients together in a bowl. Add the cranberries and currants. Set aside.
2. In a mixer bowl, beat eggs on low for 30 seconds. Add milk, oil, vanilla and salt. Mix well on medium speed.
3. Remove bowl from mixer. Pour dry ingredients into eggy batter. Mix with a large spoon until just blended. Pour batter into small pie pans and mound up the center slightly.
4. Bake at 375 degrees F for about 20 minutes until tops are golden. Remove from heat and cool on wire rack. Brush tops with melted butter. YUM!!! 
(This is a recipe that makes a bread that is moist and delicious. It can also be made into muffins.)


Questions: Either homemade or not, what delectable breads have you tried lately? And are you looking for any recipes?


Tuesday, January 3, 2012

Tabletops

Brrr! Coming in from the cold makes the kitchen the logical gathering place. It's just so cozy to sit at a farm table or lean on the kitchen counter and feel the warmth. Saving money can help you feel that much cozier, so I want you to know about William-Sonoma's January Whitesale.

Here's a word from our sponsor:
20% off all Tabletop including dinnerware, linens, and MORE! Use code: WHITESALE  

You can use the link in the sidebar. If you shop online using the link, they'll thank me, and I thank you! You can have more for less and that makes me happy! Here's to making your kitchen cozy!

Stay warm, my friend!

Monday, January 2, 2012

Delectable Num-nums, New Year's RibFest 2012

The winning ribs from our family's cooking competition! In all fairness, every entry was a winner. My category was "Best Texture" but I also won the grand prize. (I got in good with the judges. That's where age and treachery have it over on youth and vitality every time!  ;)
Having a cook-off is great family fun time! If you have friends and family members who love to cook, enjoy a little friendly competition, and can find some reliable (or easily-bribed  [HA-HA!]) judges, go to it! That's a way of creating lasting memories while you enjoy some really great food! And what a way to bring in the New Year, setting the tone for laughter, good times, and delectable num-nums in the days that follow.

New Year's RibFest 2012 COOKS:
Patience and Josh, ready for the announcement that they would win for best sauce

Jessi with her prize for best taste, winning with help from Scott who is not shown

Ronda, center, capturing the moment
New Year's RibFest 2012 JUDGES: 

The judges sample each rib entry and use their predetermined criteria to determine winners.
Sharing their thoughts in secrecy adds to the fun.


In all seriousness they made their announcement, complete with prizes for the winning entries.
For a photo essay on the entire event, check out Jessi's Gluten Free World post of the 2012 Ribfest. Yes, cooking gluten- (as well as onion-and ginger-) free added to the challenge!

My recipe, adjusted from the Memphis-Style Ribs in Better Homes and Gardens' New Grilling Book, requires an overnight marination and four hours of slow cooking with added chunks of hickory for smoking. I modified this recipe from a dry rub to a wet marinade to add more moisture and sweetness to make it a cross between Memphis-style and Carolina-style, a taste I figured would please the judges. (I know the judges pretty well! They're my grandchildren!!!) After their announcement, our judges received hearty applause and a gratuity in appreciation for their hard work.

MODIFIED MEMPHIS-STYLE RIBS

7-8 pounds of pork loin back ribs or meaty ribs
10 T brown sugar
1 1/2 T paprika
1 T chili powder
1 1/2 T garlic powder
1 tsp ground black pepper
2 tsp ground red pepper
2 tsp salt
4 T ketchup
1 T apple cider vinegar
1/4 cup Southern Comfort 


Trim the fat from ribs. Place ribs in a shallow dish with a lid or a plastic bag that can be sealed. Mix all ingredients until flavors are well incorporated. Pour over meat. Turn to coat evenly. Marinate in the refrigerator for 4 to 24 hours. At least one hour before placing on the grill, begin soaking hickory pieces in enough water to cover. 

In a smoker, arrange charcoal and have enough on hand to keep stoking the fire every thirty minutes. Place ribs bone-side down on a grill rack. Put the lid down and maintain a temperature of 200 degrees for four hours' cooking time. Don't baste. Check the ribs only a couple of times to reposition if necessary, trying to maintain constant heat. By the end of the four hours, the meat will be done and tender but not dried out. 

This is a spicy treatment for ribs, but the judges weren't scared off by the spice! They loved it and I think you will too! Consider using this recipe or check out Jessi's Gluten Free World for the other recipes used in the 2012 RibFest.

I challenge you to have you own cook-off! If you do, I want to hear about it!