Thursday, April 26, 2012

Two Brooding Hens and Maybe a Chick!

the hens in their culvert nesting boxes in the brooder
Update from last Thursday: We have two brooding Speckled Sussex hens! The one started again after abandoning her first nest. With ease, Chris moved their culvert nesting boxes into the brooder, apparently just in time. Look closely at the black nest on the right. Do you see the egg shell? On closer inspection there is a tooth mark on the inner eggshell! We thought we could hear a cheep-cheep-cheep. We don't know since we didn't want to disturb the hen. It may have been a killdeer out in the field. (?!)

We're excited and will keep you informed as soon as we know. The Speckled Sussex is a heritage breed that is "recovering" from having been "threatened", according to the American Livestock Breeds Conservancy.


The brooder now needs a few basic pieces of furniture. First, a creep feeder for the chicks!
the brooder
A few hours later the very same day...
MAJOR UPDATE:  We have baby chicks!!!

Maybe more later. She and the other hen are still on their nests!

Click here for great country blogs!

Sunday, April 22, 2012

Sourdough Breadmaking, from starter to delectable finish!

I decided recently, for the benefit of patrons of my farm market, to revive an old skill: the making of sourdough bread. 

A stone jar works best for the starter that takes several days to prepare.

On baking day, a dough hook can save you from a labor-intensive task.

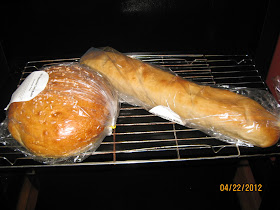
One day recently I made 8 loaves of sourdough bread. Some for the market...
      and some for me and my family. The experience is  something near heaven when you sit down after long hours of work to enjoy the ageless salty and somewhat nutty taste of a chewy sourdough bread along with a good aged cheddar cheese and your favorite beverage.  In this case, it's a glass of my grape wine, ready to bottle.

Thursday, April 19, 2012

The Broody Hen in her Culvert Nesting Box

This is our broody hen. We're edgy with anticipation. Others of our flock of 48 have tried but this one just might succeed. She has a certain stick-to-it-iveness. Her whole body says she's determined!


The year-old hen has made her nest in a culvert nesting box. She is not yet in her brooder, just across the hall from the others. When she moves, we're watching another broody hen that may join her soon.

Our hens have preferred these culvert nesting boxes over the yellow buckets that are on another wall. Moving her will be fairly easy, we think. Chris plans to slip a piece of plywood between the culvert and the camouflage wall to easily lift the culvert nest out of its slot, hen, eggs and all. We're hoping this won't upset the setting hen. Then, just a few steps away is the brooding room. He can then replace this nest with another piece of culvert and bedding. Again, Chris has put together a clever design. We're hoping it works. I would love to have hens raising their own Speckled Sussex chicks! When it happens, you'll know! She has been on her eggs for 13 days and somehow she has 10 eggs or so without any interference from us!

Several of you are already having chicks this spring from your own hens. 
I can hardly wait for your thoughts, experiences and words of advice!   
:D


Wednesday, April 18, 2012

Preparing Garden Spots for the Vegetable Starts

A brief moment of rest for Chris at our camper on the farm where we hold our farm market. He's been working night and day, growing the little seedlings that soon will go into the ground that he's getting ready. After all, if you're going to have a farm market, you kinda need to have some produce!!!
Chris is using a 1980 Gravely that can do ANYTHING!  We believe that was the last year the Gravely tractors were made in America. I have the utmost respect for his older machinery. The plow was made in the 30's. All his attachments were made from the early 30's to the mid-50's. It's really handy that Chris likes restoring things. These work well and help keep the cost down.

After all, Chris is the real force behind the farm market. He says it's me, but I know better. Sure, I love cooking and baking, but he has wanted to farm all his life, and what better way to serve the community than to raise fresh, safe, great-tasting produce?! 


During the day, the gardens are getting plowed and tilled while the little plants are getting much-needed sunlight on our deck at home. 


Then at night, all the little plants come back inside. After all, the babies need warmth to grow and, remember, we have no greenhouse yet so our home has to serve the plants' needs for now.


Some of these seedlings will be planted in our garden spots and eventually find their way to market.


Others will be sold as plants at our farm market to go into other people's gardens.

Monday, April 16, 2012

Restoring a Rusty Cast Iron Dutch Oven

wall hangers

more wall hangers

cast iron skillets that I use daily
I grew up with an appreciation for cast iron cooking, and began collecting new and vintage cast iron and  steel pieces at an early age. The secret to their longevity is in the seasoning. A cast iron piece that is well-seasoned will hold up to most cooking techniques without rusting. MOST.

Occasionally I have bloopers, but I can't show a picture of what I did to my 12 quart cast iron Dutch oven because I was so beside myself I didn't think to take one. I had prepared peach cobbler over coals, just like I had done many times before, but this time my cobbler had boiled over! We had eaten around a campfire after dark and I decided to wait until morning to clean it. To my dismay, the lid was stuck on. I meant to ask Chris to try to pry it off, but I forgot about it and then left it out in the rain. You should never ever EVER do that, and I knew better. Life gets busy and I totally forgot. My beautiful Dutch oven rusted. Badly. Normally, all you have to do if a piece of cast iron cookware has some rust is to gently rub out the rust and oil it, but NO! Mine was crusty rust!


Chris came to my rescue. Dressed in heavy gear, he took the first step in restoring my treasured piece. On the day he was rescuing the hay rake that he acquired, he took my dreadful-looking Dutch oven and also sand-blasted it. That is an extreme rescue, but by the time I got the lid off, it was so bad inside and out that it had been rendered useless. Cast iron is a good investment and should last lifetimes, so we both knew this piece needed intervention if it would ever become an heirloom.
my cast iron Dutch oven after sand-blasting

Then came my part in the restoration. It had to be seasoned. Otherwise, it would become a rusty mess and would be unsuitable for cooking. I used regular vegetable oil and a cotton cloth and simply rubbed oil all over the inside and outside of the Dutch oven and its lid. Then I placed the pieces in my gas oven at 200 degrees F. for 2 hours. To be sure it was covered completely with oil but with no oil pooling that would gel, I took it out and reapplied a thin coating of the cooking oil to the entire surface. Then, back to the oven for an additional 5 hours.


ALMOST fully restored


This is how it looked after seasoning, a darker patina, ready for cooking again. After the next few uses, I will oil it each time and place the Dutch oven back in 200 degrees F. for 2 hours to complete the seasoning process. Then, eventually, it will have the even black color of my other vintage pieces.

Wednesday, April 11, 2012

Early Morning Frost Damage Survey

This morning, after a cold windy night, I took a quick walk-about and here is what I found.
The grape arbor at the back deck looks healthy,

and terrific tulip and tarragon.

Salvaged strawberry plants from last year's bed look strong...

but these pansies tell a different story,

and some of the 250 tiny little strawberry crowns I planted last week can still be seen reaching for the sky, but barely.  Not all survived.  :/  

In spite of bitterly cold temperatures, the gorgeous grapes in the vineyard are still growing,

and this young white Edelweiss grapevine seems hardy.

Meanwhile, this year's garden plants wait out the cold spell in our loft-turned-greenhouse,

and our herbs are looking herbaliscious except for the sweet basil, already frost-bitten last week!
The forecast here looks even harsher for tonight, with temperatures expected to dip below 30 degrees F. Another year of lost crops due to freezing temperatures? We had too much gusty wind last night to get the strawberries and grapes covered, but tonight I'll do my best! No smudge pots to use on the four rows of grapes so...


feeling helpless, I asked Chris what else we could do. He simply said an age-old line, 
"Man proposes, but God disposes."


Really, Chris, that's the best you can do?  


It feels like Mother Nature said, "OOPS! I forgot all about giving you winter. Here! How's this?!"

Please also check out these Rural Thursdays Bloggers:
Two Bears Farm
A Rural Journal


(OH, NO! Another hard freeze tonight!)


Monday, April 9, 2012

Easter Designs of Love, Life, and Shared Times

My grandchildren came over! I love it when that happens!!!

One granddaughter decorated before the others arrived. 
"This is so BEAUTIFUL!!!," she said when she set up the crocheted display. 

 My cousin Stephanie had crocheted them.  (Think Stephanie's Sticky Buns. YUM!!! Recipe link at sidebar.) 


Then class began for Egg Marbling 101.
The Egg Marbling Artists
The results after a few choice eggs were eaten!


After a brief demonstration, the only rules were 
*Share the dye. 
*Have fun! 
The dye did not dry before some of the eggs met their demise!

I love the meanings of Easter, from the grace of God in our lives way back to the early Pagan traditions of celebrating new beginnings. On this day, we celebrated so much, including life, love, and our time together!
Thank goodness, this was our only Easter Twister! Mother Nature played by the rules, for once.
Perfect weather for playing outside!

The girls could do this for hours! How do they do that???

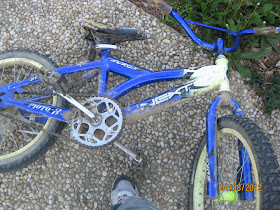
This bike romped and ramped and rambled some more. Finally, its chain came loose, allowing my grandson
 to take a break.  

Besides, the garage had to be designed and built!

I will never tire of hearing my grandchildren say, "Our nana is the best nana ever!" The joy in their faces tells me even when their voices don't!

What a delight they are!

Photo credits: The grandchildren and I took all the photos for this post. 

Tuesday, April 3, 2012

Plants are Getting Market Ready!

 We are getting a number of plants ready for our farm market. From broccoli, white cabbage, red cabbage,  cauliflower plants and fresh green onions to potted herbs. 


Without the advantage of a greenhouse, Chris has turned our loft into the next best thing. He  babies our little vegetable plants night and day. They get plenty of sunlight, moving onto the deck during the day. A camp shower bag provides easy watering with its shower head nozzle. Lately Chris has been transplanting his veggies into individual cells, giving them more room, easier access to nutrients, and a great start.


My herbs are hearty and used to being outside. I potted a mix of herbs for kitchen or patio to make their debut at our farm market. The rangy tarragon in the herb bed forms a backdrop for tera cotta pots that are filled with Greek oregano, Italian flat leaf parsley, sweet basil and a pansy. Italian food lends itself so well to fresh herbs, so these herbs are a good introduction for the novice cooks out there!


One of the reasons our plants are growing so well has to do with a lesson we learned the hard way last year. Three different times I tried unsuccessfully to start tomatoes from seeds last year. Always before, I had used plain rainwater. Last year I used our county water, just regular tap water. Time after time, the little leaves would turn white and the stems would pinch off at the base, killing the young plants. Chris read extensively and discovered that the calcium chloride in our drinking water was killing the plants. The annual water reports read well, but we have completely avoided that water this year in our plantings. Our heirloom tomatoes should suffer no such plight. 


The water we use now for our plants is our farm's well water, the same water Chris grew up on. It is a deep reservoir, very tasty and pure. Well water has advantages over rainwater. The natural minerals and rocks that the water percolates and filters through are beneficial to the plants. Since last year's eye-opening experience, that wonderfully fresh water not only feeds our new plants but has also become our drinking water. 


For the plants, the result is faster growing and stronger veggie plants that will be market-ready for the weekend! For me, I just feel better!


At our farm market, we hope to offer customers the best products available. For this weekend: cabbage, broccoli, and cauliflower plants, potted herbs, cut herbs (tarragon, spearmint, and Russian sage), and fresh green onions. In a couple of weeks, we should have several different pepper plants and tomato plants, including a few heirloom varieties.


Of course, I will continue making jams, jellies, and baking up a table full of goodies.  One new item this coming weekend: Hot cross buns!


A word of caution: Watch what you're drinking, not just what you're eating. Stay healthy, my friends!  

Sunday, April 1, 2012

Restoring Old Equipment with Sand Blasting


While I played around with the farm market, Chris had other things to do.

He had traded for a very old, 1957 model, Oliver rake and an Oliver hay baler, almost as old. These were partial payment on a land clearing job he had done. Since Chris is not a person to just leave equipment in the yard as ornaments, he proceeded to take them apart and get them back into good working condition so that he can make hay for local farmers.

 That meant sand blasting in our back field where the clay soil needs the sand anyway. He is very cautious about safety. You shouldn't breathe the dust from the sand. It stays in the lungs like asbestos. Besides the silica, the old paint could be lead-based.


Chris had built this sand blaster several years ago out of an old sand pot, box tube, lawnmower wheels, steel pipe, and a heavy duty air hose.
(He also sand blasted something for me, but that's another post.)
Here are some pieces sand blasted and primered.
[Meanwhile, I sold out of just about everything I had, and I had started with a huge tableful! No more bread, cinnamon rolls, pies, cakes, blackberry jam and strawberry jam! Gone was the 16-hour day of baking! By the time I needed to put things away, there was very little to do. Just a few cookies and a little black walnut fudge. I had my weekly drawing and...(drum roll)...
the winner was Joy Carter!!! 
She's going to pick up her winning prize next Saturday! I've promised her some jam.]
 Chris has his parts protected from the  elements ...
and ready to put back together before the final painting.